
A great thing in programming are loops like the for-loop. It repeats tasks like blinking an LED a specific number.
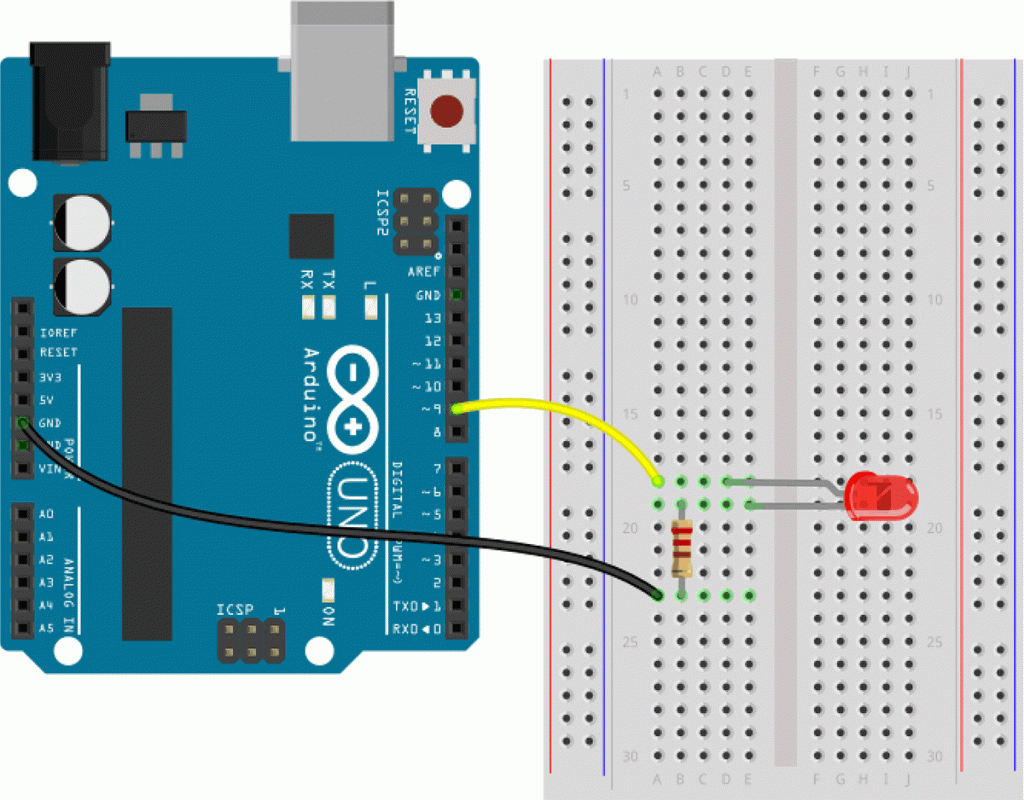
For the following project, you can still use the code from the previous unit.
The for-loop is repeated for a specific number. It looks like that:
for (StartValue; Test; FollowUp){

}
We can simply put the commands which should be repeated into the curly brackets. This should be the blinking of our LED:
for (StartValue; Test; FollowUp){
  digitalWrite(ledPin, HIGH);
  delay(200);
  digitalWrite(ledPin, LOW);
  delay(200);
}
StartValue
For the start value, we create a new variable. Fortunately, we can simply do that in the same line:
for (int counter=1; Test; FollowUp){So, it is an integer variable (int) with the name counter which equals 1.
FollowUp
Every time the for-loop is repeated the variable counter should be increased by 1. So we write as FollowUp:counter = counter +1
for (int counter=1; Test; counter = counter+1){Test
The LED should blink for three times and we have a variable which counts up every time the LED blinks. Somehow we have to check, if our variable larger then 3 to stop the for-loop. No problem! That is what the Test is for: counter<4
for (int counter=1; counter<4; counter = counter+1){Now we only have to ad a long break after our for-loop. Otherwise the program would directly start over and we wouldn’t see a change. Let’s put in a break of 2 seconds. You already know, how to to this, no? 🙂
int ledPin = 9;

void setup(){
  pinMode(ledPin,OUTPUT);
}

void loop(){
  for (int counter=1; counter<4; counter = counter+1){
    digitalWrite(ledPin, HIGH);
    delay(200);
    digitalWrite(ledPin, LOW);
    delay(200);
  }
  delay(2000);
}
Upload it to your Arduino.
Does it work? Perfekt! It blinks three times and than it stops for two seconds. Change the number in the Test-Argument to 10. What happens?
int ledPin = 9;

void setup(){
  pinMode(ledPin,OUTPUT);
}

void loop(){
  for (int counter=1; counter<10; counter = counter+1){
    digitalWrite(ledPin, HIGH);
    delay(200);
    digitalWrite(ledPin, LOW);
    delay(200);
  }
  delay(2000);
}
Hm, it just blinks nine times. It is because less than means 1 to 9, not 1 to 10. Change the less than (<) to less or equal (<=).
int ledPin = 9;

void setup(){
  pinMode(ledPin,OUTPUT);
}

void loop(){
  for (int counter=1; counter<=10; counter = counter+1){
    digitalWrite(ledPin, HIGH);
    delay(200);
    digitalWrite(ledPin, LOW);
    delay(200);
  }
  delay(2000);
}
Now it blinks ten times, no? Let’s build a little calculator with it. At first, we create the variable myResult and send it to the for-loop:
int ledPin = 9;
int myResult;

void setup(){
  pinMode(ledPin,OUTPUT);
}

void loop(){
  for (int counter=1; counter<=myResult; counter = counter+1){
    digitalWrite(ledPin, HIGH);
    delay(200);
    digitalWrite(ledPin, LOW);
    delay(200);
  }
  delay(2000);
}
And now we need the program to do the calculation. I really don’t want to do everything by my own 😉
Let’s start with: 2 + 3
int ledPin = 9;
int myResult;

void setup(){
  pinMode(ledPin,OUTPUT);
}

void loop(){
  myResult = 2 + 3;
  for (int counter=1; counter<=myResult; counter = counter+1){
    digitalWrite(ledPin, HIGH);
    delay(200);
    digitalWrite(ledPin, LOW);
    delay(200);
  }
  delay(2000);
}
Upload the program to your Arduino and count the numbers of blinks. Now, calculate some other problems like 4 + 7 or 329 + 12. Well done!
