But now let’s really build something. Take two LEDs, two long patch cables, a resistor, the breadboard and the Arduino and build the following circuit.
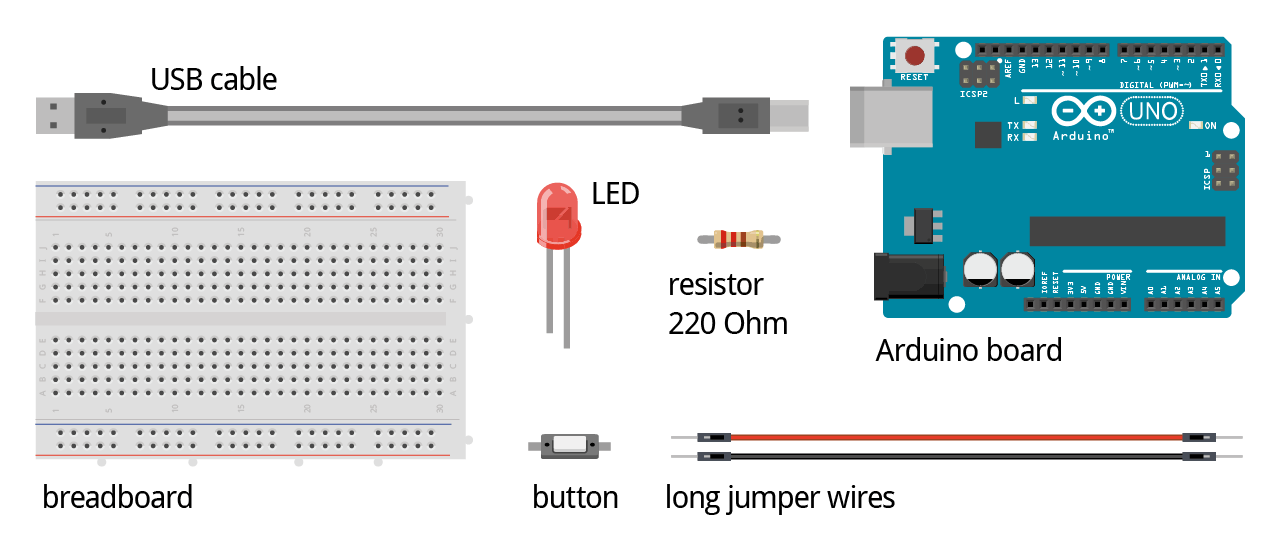
Parts
Circuit
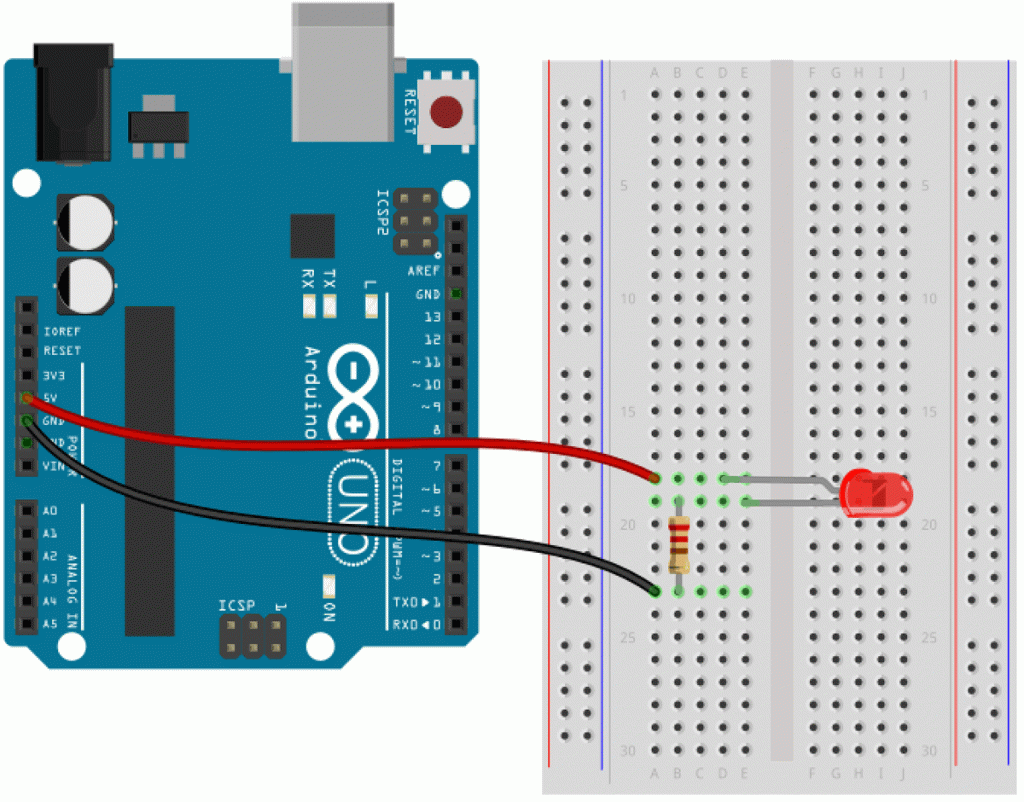
If you now connect the Arduino with your computer the LED will light up. If not, check if you put in LED in the proper orientation. Current can only pass the LED in one direction. The longer leg (anode) needs to be connected to the plus pole, the shorter (cathode) to the minus. The connections of the Arduino are the power supply pins. The GND-Pin is like the minus pole of a battery, the 5V is like the plus pole. 5V means that the voltage at that pin is 5 volts.
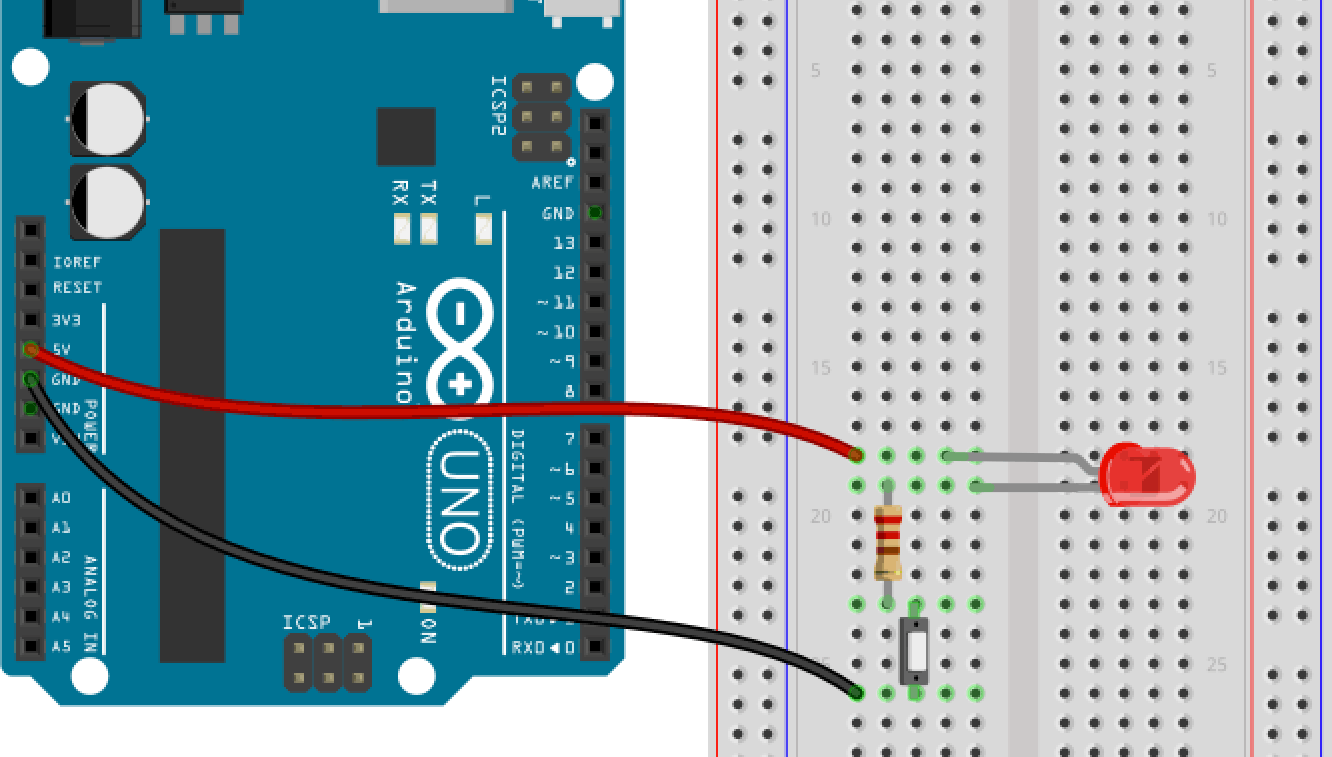
Part 2 – Extending with a button
Alright, but such a flash light would be a bit boring. It would just light until the batteries are empty. OK, the Arduino will not get empty but let’s put in a button anyway. It doesn’t matter where a circuit is opened and closed. So the button could be on the right or left side of the LED.
Now, the LED will only light up, if the button is pushed or the circuit is closed. But why do we need a resistor?
Expert Knowledge: Resistor
The Arduino board provides 5V (volts). That is much too much for a LED and the resulting current would destroy the LED. To limit the current, we use a resistor. In that case it is a 220 Ohm resistor. The color rings show its value. If you want to know, how to decode the rings, check this site on Wikipedia: Electronic Color Code.

The 220 ohm resistor has the following color rings: red – red – brown – gold.
