
You already know how to switch on and off LEDs. Now, we want to try if we can also fade it.
The light switch of your room can be switched on and off. Everything what can take exactly two conditions is called digital by the Arduino. You learned the commands digitalWrite() and digitalRead(). Sometimes, lamps have not a switch, but a knob or fader to fade it. With it the luminosity can be adjusted. So it not only knows on and off but conditions in between. Arduino calls it analog.
To fade a LED we can simply use the command analogWrite().
analogWrite(ledPin, luminosity);Again, we send two arguments. Similar to digitalWrite() the first argument defines the pin number. But this time the second argument is not just HIGH and LOW but a number between 0 and 255. That means we can adjust the luminosity of a LED in 256 steps.
Circuit
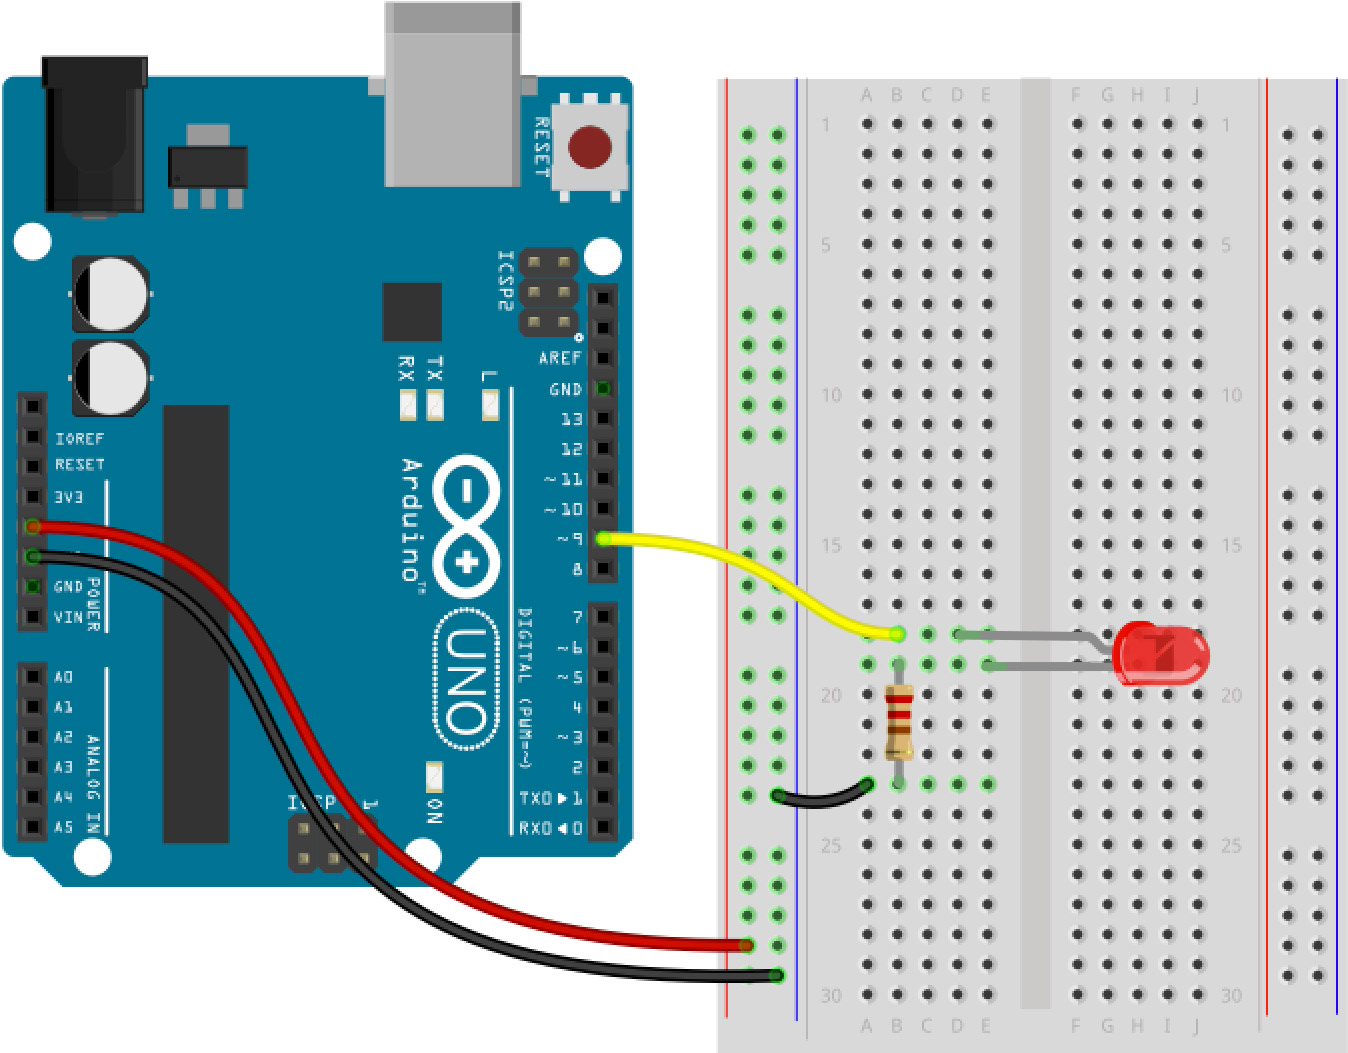
Yes, you already know this circuit. It is a LED connected through a resistor to the GND and directly to pin 9.
This could be the program code to test it:
int ledPin = 9;

void setup(){

}

void loop(){
  analogWrite(ledPin, 200);
}
Did you noticed there is nothing in the setup()? When we use the analog output we don’t have declare something like pinMode() like we would have using the digital output. Cool. Now, just try some other values like instead of 200 (e.g. 50,250,0,100). Don’t forget to upload it 😉
Expert Knowledge: PWM
To fade LEDs Arduino uses a trick. Actually, we would have to reduce voltage but Arduino is not capable to do so. But Arduino is very good in rapid switching pins on and off. The relation between on and off controls our perception of the luminosity. This trick is called pulse width modulation (PWM) and is very common in micro-controller technology. Arduino can’t do PWM on every pin. PWM pins are labeled with a wavy line (pins 3,5,6,9,10 and 11)..
Fading using the for-loop
We discussed the for-Loop in Unit 10. Let’s use it to fade the LED automatically. Using a for-loop we can change a LED every time it is repeated. I say we use it to count the luminosity. The variable should start at 0 and count up to 255. That looks this way:
for (int luminosity=0; luminosity <=255; luminosity = luminosity +1){If you are a lazy coder (like me) you can write instead of
luminosity = luminosity + 1even that
luminosity++It also counts the variable up by 1. To make it more clear now, I stay with the longer version. The code looks like that:
int ledPin = 9;

void setup(){

}

void loop(){
  for (int luminosity =1; luminosity <= 255; luminosity = luminosity +1){
    analogWrite(ledPin, luminosity);
    delay(20);
  }
}
We will need a little delay to perceive a change. Upload the code to your Arduino.
Now the LED slowly turns on. What do we have to do to slowly turn it off? We would need a second for-loop counting a luminosity variable from 255 down to 0 reducing itself by on every time the for-loop is repeated. The for-loop should be repeated as long as the variable luminosity is greater than 0. Hm … that should be possible, no? Try it by your own. You can do it!
Compare your approach with this solution:
int ledPin = 9;

void setup(){

}

void loop(){
  for (int luminosity =1; luminosity <= 255; luminosity = luminosity +1){
    analogWrite(ledPin, luminosity);
    delay(20);
  }
  for (int luminosity =255; luminosity >= 0; luminosity = luminosity -1){
    analogWrite(ledPin, luminosity);
    delay(20);
  }

}