
Did you build the circuit from Unit 6? Perfect! If you already connected the Arduino to the computer plug it out again. Open the Arduino software on your computer and let’s do two little adjustments.
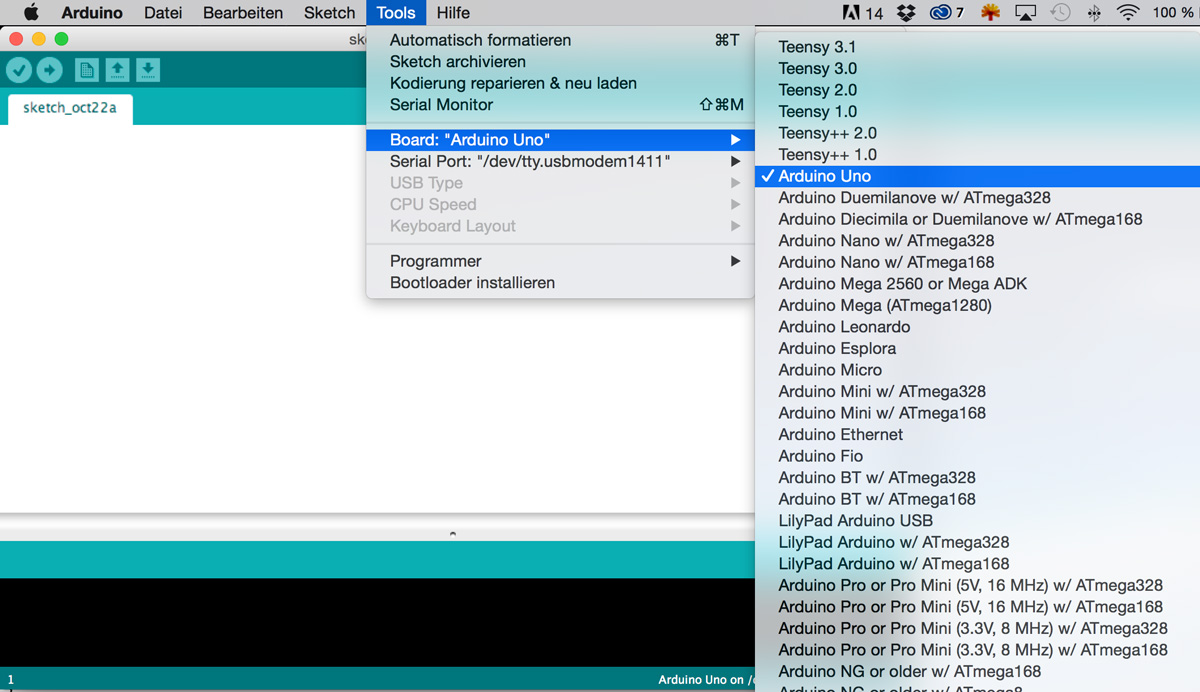
Select the Board
In the menu click on Tools > Board and select Arduino UNO like shown in the picture.
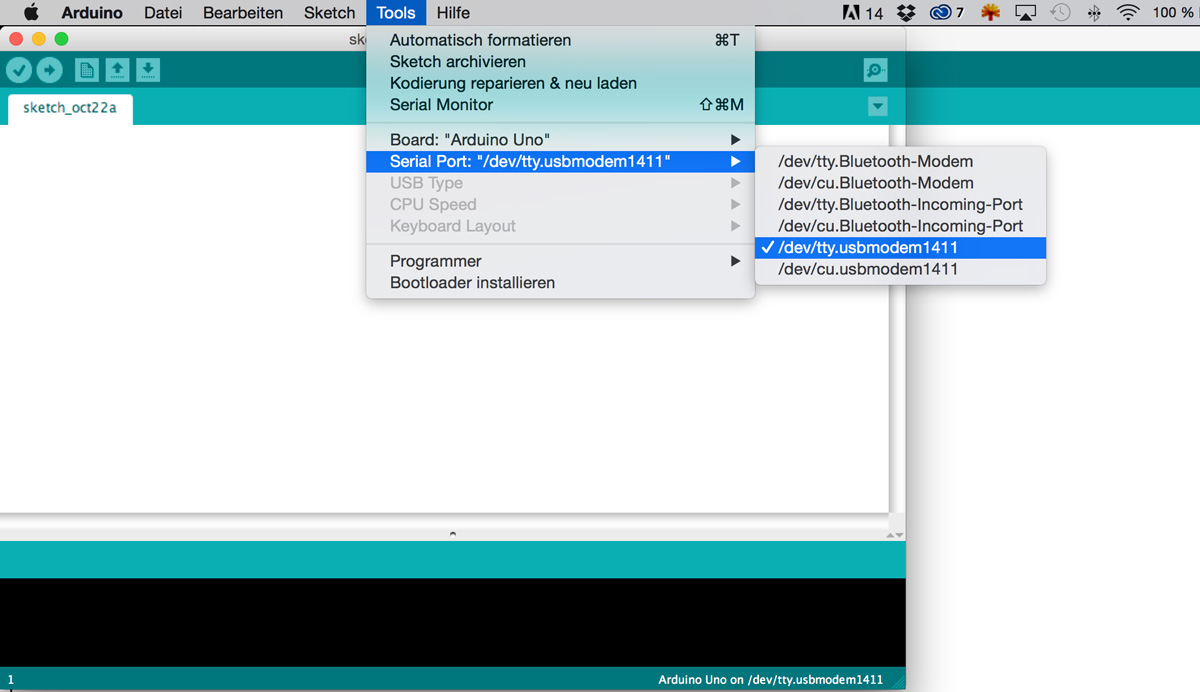
Select the Port
Now click on Tools > Port. Remember the entries which you see here. Maybe you want to write them down. Now connect the Arduino with the USB cable and again click on Tools > Port. Now you should see a new entry. (On a mac it looks like «/dev/tty.usbmodem….», on Windows it usually looks like «COM…»). Select the new entry and we are ready to go
Now the Arduino software knows, which Arduino we are using and where it is connected to.
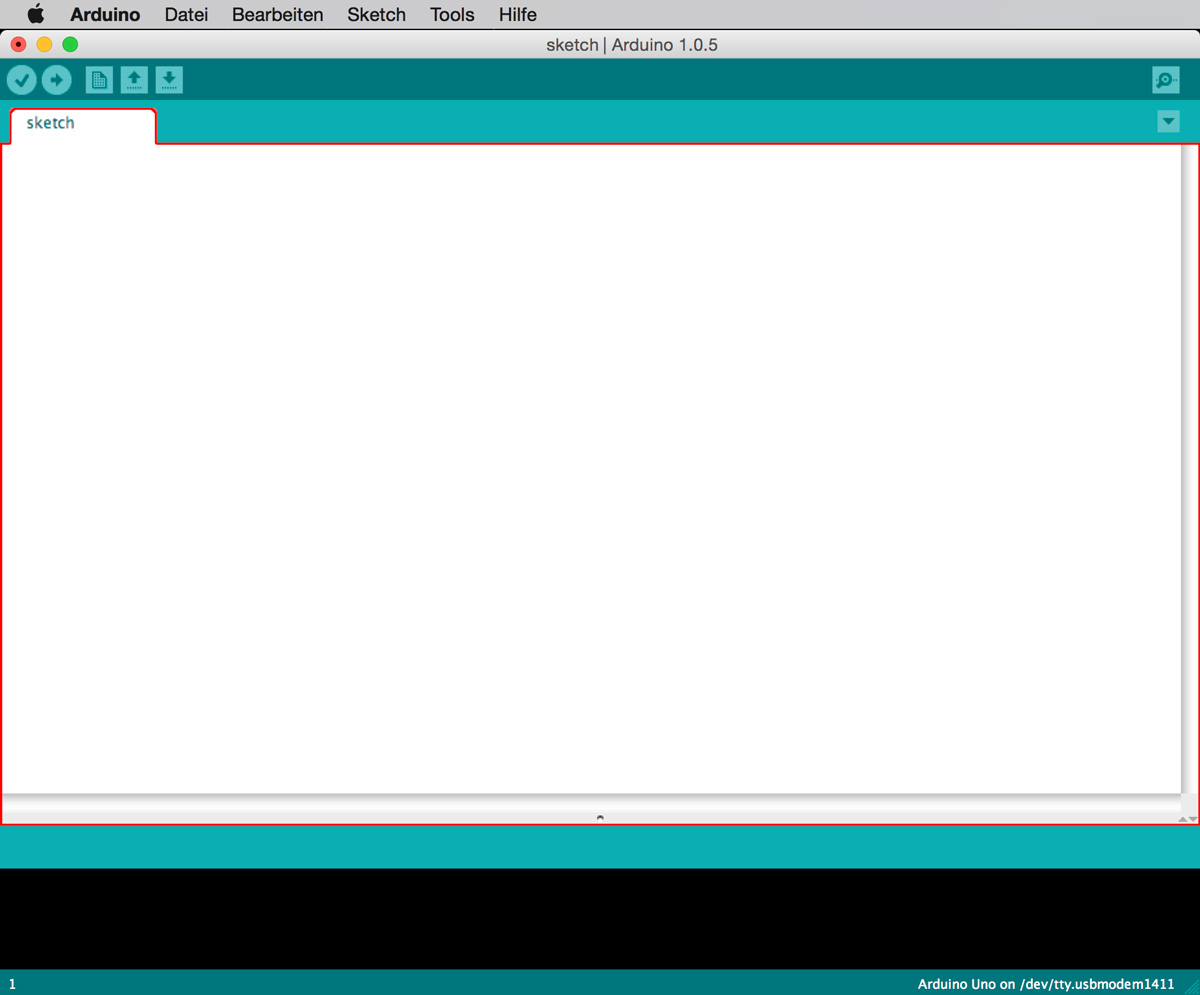
Arduino Programming
The white area of the Arduino software is the programming window. In here, we will write all the programming code. Write? Yes! Programming is nothing more than typing commands. The good news is: It will do what you say 🙂
Like in grammar there is spelling and grammar. Those rules are called syntax. Don’t worry. You will learn that very fast. It is easy 😉
If you want to program an Arduino, you have to write the following into the programming window. It is the base structure for every Arduino program:
void setup(){

}

void loop(){

}
Looks odd? So here we have two method blocks. You can put commands into a method and the program will execute it. A command could be: Switch on a LED! The curly brackets { } open and close the method block.
Everything in the brackets belongs to the method. The word void tells the Arduino that it is a method. After void comes the method name. In that case it is setup and loop. After the method name there has to be an opening and closing normal bracket: ()
But don’t worry about the syntax. You will learn it automatically and I will show you how it is written correctly.
You can type the curly brackets on windows by pressing Alt-Gr + 7 and Alt-Gr + 0, on a Mac by pressing Alt + 8 and Alt + 9.
Expert Knowledge: Setup and Loop
Imagine you get a new bicycle. At first you have to set it up. You adjust the saddle and the handlebars. You only do this one time. And now? You sit on it and start to pedal. You push the left pedal, then you push the right one. And you do that over and over again. We could say, you loop that movement.
So: void setup() is only executed one time while void loop() repeated over and over again.
void setup(){

}
This part is only executed one time. It is the setup method.
void loop(){

}
This part is repeated continuously like pedaling on a bike. It is an infinit loop an is called the loop method.
Command
Alright. And why is that helping us? Let’s talk about what our program should do. It should switch on an LED.
To do so we have to tell the Arduino that we would like to use a digital pin to switch something – yes, our LED. This would convert the pin to an output pin. We have to do that only one single time. So it belongs into the setup method. We use the following command to tell the Arduino what it should do:
pinMode(9,OUTPUT);That is a great command. It consists of the keyword pinMode followed by two round brackets. Here we write two parameters. The first is the number of the pin. We connected the cable to pin 9 so we have to write a 9. The second parameter is he function we want to use. In this case we want to use the pin as an output, so we write OUTPUT (yes, all capital letters). Every command line has to end with a semicolon (;).
So: Command name, opening round bracket, pin number, function, closing round bracket, semicolon -> That is the command 😉
Now the Arduino knows that we want to use a pin as an output. Now we have to tell it that it should switch it on.
digitalWrite(9, HIGH);Looks similar to the first command, no? This command is named digitalWrite. It also gets parameters. Like pinMode the first parameter is the pin number (9). The second parameter is HIGH. That switches the pin on (LOW would switch it off). This time, we want to do this only one time, so you can write it into the setup
Now, the program should look like that:
void setup(){
  pinMode(9,OUTPUT);
  digitalWrite(9, HIGH);
}

void loop(){

}
If you hit the TAB key, the command lines move a bit to the right. It makes the program more easy to read. Alternatively you can go to the menu and click Tools > Auto Format. The Arduino software will arrange everything nicely for you.
Upload
Now you have a beautiful program but the LED is still dark, right? That is because we have to upload the program to the Arduino board. In the menu click on File > Upload. Now, you should see the yellow LEDs on the Arduino flashing for some time and afterwards your LED should light up.
The LED is not lighting up? Check again if all cables are connected correctly. Sometimes, there are some spelling mistakes in the code. If so, you would see red text in the black area under the code window.
It lights up? Congratulations!!! You wrote your first program! That is really great 🙂

Pingback: Unit 8 – It's alive! - StartHardware - Tutorials for Arduino