
Did your LED light up? Good work! Now let’s make it blinking.
In order to make a LED blinking we need to switch it on and off. You already switched it on using the command:
digitalWrite(9, HIGH);You can switch it off with:
digitalWrite(9, LOW);So! HIGH means on and LOW means off? If you want to put it like that, yes. HIGH means that we switch 5 volts plus to the pin, LOW means that the GND (minus pole) is switched to the pin. Later, we will use it again, but now let’s continue.
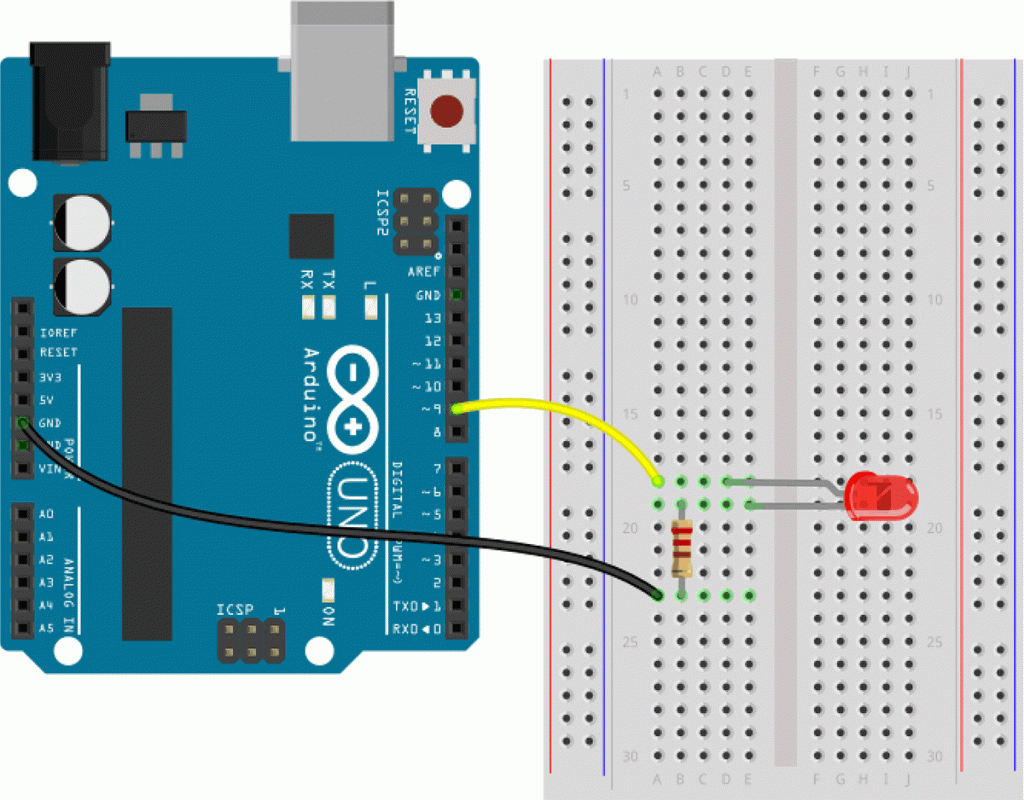
We can simply use the circuit of unit 7.
Switching on and off should be repeated over and over again. That means, we have to put in the commands to the loop method. That looks like that:
void setup(){
  pinMode(9,OUTPUT);
}

void loop(){
  digitalWrite(9, HIGH);
  digitalWrite(9, LOW);
}
Upload it to your Arduino board and see what happens. (Klick in the menu on File > Upload.
Hm, the LED is still turned on even if the programming code looks correct. The Arduino repeats the switching on and off so fast, that we can’t see the change. We need to break the program down somehow.
To stop a program for a certain time we can use the command:
delay(1000);It delays the program. The value in the brackets tells it, for how long in milliseconds. 1000 milliseconds are one second.
void setup(){
  pinMode(9,OUTPUT);
}

void loop(){
  digitalWrite(9, HIGH);
  digitalWrite(9, LOW);
  delay(1000);
}
And now upload it to the Arduino.
Tricky! Now, the LED stopped work completely. The LED is now switched on and almost immediately switched off. Afterwards we wait a second. Well, now it’s obvious that we can’t see something. Most of the time the LED is off and just for a fraction of time switched on. Let’s try it that way:
void setup(){
  pinMode(9,OUTPUT);
}

void loop(){
  digitalWrite(9, HIGH);
  delay(1000);
  digitalWrite(9, LOW);
  delay(1000);
}
Hurray! Now it works. The LED is switched on (HIGH), lights up for one second and is switched off (LOW) for another second. That was fiddly, but now it is actually quite clear. The Arduino works so fast, that we sometimes need to use a little break.
Now, it is your turn: Change the program in that way, that the LED blinks much faster. Here you can find the solution, but first try by your own:
void setup(){
  pinMode(9,OUTPUT);
}

void loop(){
  digitalWrite(9, HIGH);
  delay(200);
  digitalWrite(9, LOW);
  delay(200);
}
Pingback: Unit 10 – For-Loop and the LED calculator - StartHardware - Tutorials for Arduino
Pingback: Unit 13 – Fading LEDs using the Analog Output - StartHardware - Tutorials for Arduino