
A very important thing in programming are variables. I guess you already know it from math class. If you say x=10 it means that everywhere x can be replaced by 10.
Thing of variables as little boxes or containers in which we can store information like numbers.
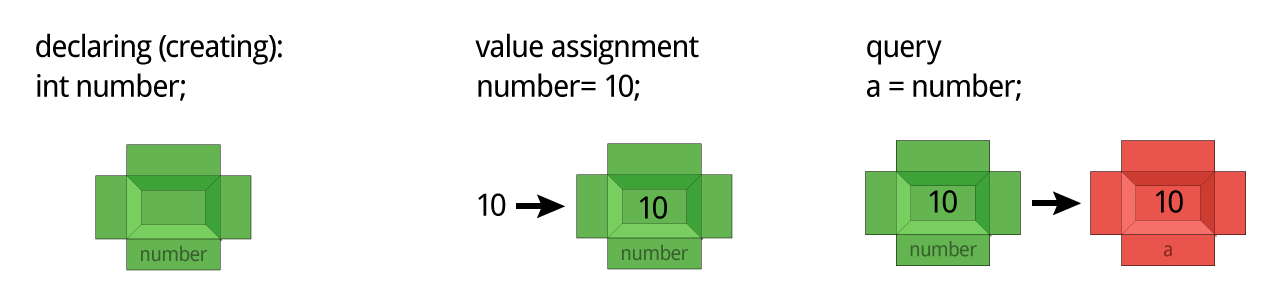
You can choose your own variable name. A variable could read Tim, Sarah or Eagles. Of course it makes more sense to name after it’s purpose.
Let’s see the programming code of the last example, again:
void setup(){
  pinMode(9,OUTPUT);
}

void loop(){
  digitalWrite(9, HIGH);
  delay(200);
  digitalWrite(9, LOW);
  delay(200);
}
The LED was connected to pin 9. Because of that, every command here gets a 9. But what would happen, if we would connect it to pin 8?
Circuit
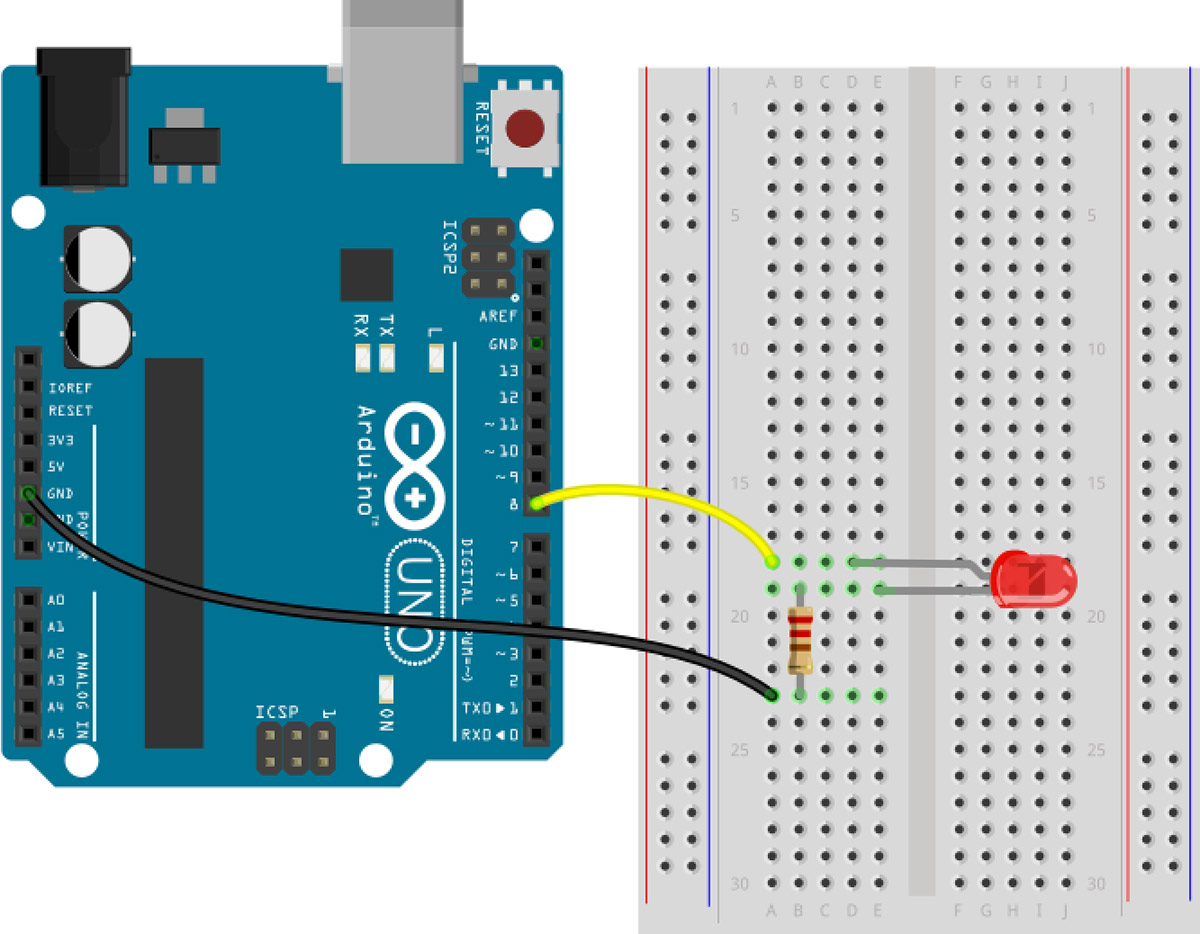
Of course, we would need to change every entry in the commands.
void setup(){
  pinMode(8,OUTPUT);
}

void loop(){
  digitalWrite(8, HIGH);
  delay(200);
  digitalWrite(8, LOW);
  delay(200);
}
Well, in this short example it is not a big deal, but if you are writing larger programs, it could happen, that you forget a change. It would be better to just use a variable.
This variable should store the pin number of the LED, so let’s name it ledPin. The capital letter for the new word makes it easier to read. Variable names must not contain blanks.
This is how we create a variable (Programmers call it we declare it):
int ledPin = 8;The word int is short for integer. That means that this variable will only contain countable numbers like 1, 2, 3, 4 … When we create a variable we always have to tell Arduino, of what type it is.
We need the variable to be 8, because this is the pin where our LED is connected to. The equal sign sets our variable to 8.
Now, we declared an integer variable with the name ledPin and we set it to 8. Everywhere, where we now write ledPin, it is replaced by 8.
int ledPin = 8;

void setup(){
  pinMode(ledPin,OUTPUT);
}

void loop(){
  digitalWrite(ledPin, HIGH);
  delay(200);
  digitalWrite(ledPin, LOW);
  delay(200);
}
Now, put the cable back from pin 8 to pin 9. You need to change the program. Do you have an idea, how? Of course you only need to change one single number. That’s programming 🙂
int ledPin = 9;

void setup(){
  pinMode(ledPin,OUTPUT);
}

void loop(){
  digitalWrite(ledPin, HIGH);
  delay(200);
  digitalWrite(ledPin, LOW);
  delay(200);
}