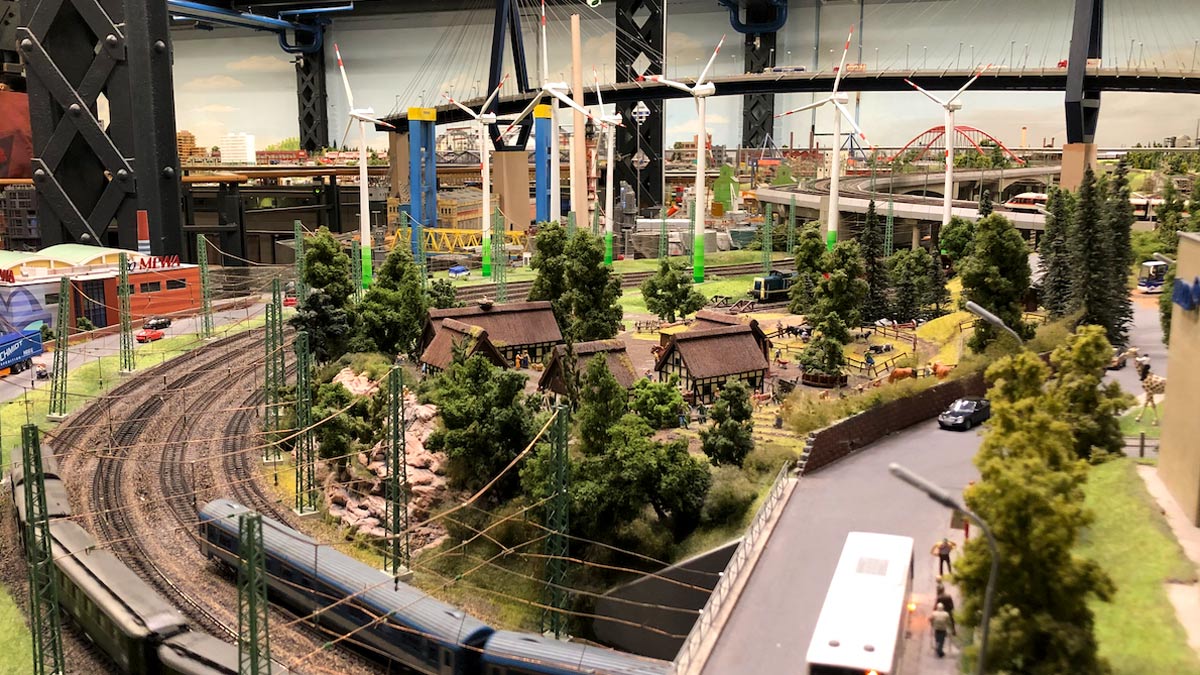
The Miniature Wonderland in Hamburg really fascinated me. Of course, all the trains and tracks are already ingenious, but the real magic is the level of detail and not least the lighting and effects that are installed. And of course I wanted to recreate something like this with Arduino and make it available to you. I put special emphasis on customizability and ease of replication. I named the system RaylFX, because I want to expand it more and more in the future.
The RaylFX System
I designed the RaylFX system in such a way that it consists of individual components which receive a common time via a central element, the control module, because, as with the Miniature Wonderland, it should become day and night with RaylFX after an adjustable time. This function is performed by a low-cost Arduino Nano, which sends a number from 0 to 23 to all modules in the system at adjustable intervals. These modules also use the Arduino Nano as a platform. Depending on the project (e.g. fairground, construction site, settlement, etc.) other components are integrated. Again, I have paid attention to simplicity and low cost, although both must please be seen in relation. Even though I tried to make the application as simple as possible, this is still a project for people with some experience in using Arduino. For this I recommend my e-book “Arduino für Anfänger und Anfängerinnen”. In it there are all the basics you need to get started.
Control Module – Wiring Diagram
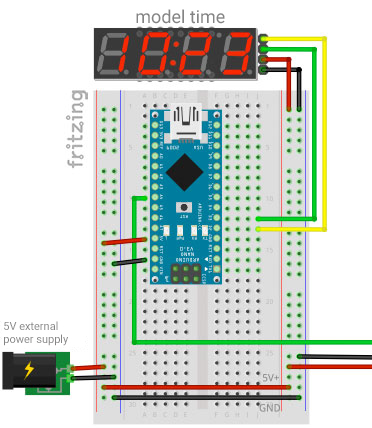
The control module consists of an Arduino Nano whose pin D18 (A4) is connected to all other modules at pin D18. (The green cable in the picture is redundant.) In addition, there is a central power supply that connects all modules together (5V+ and GND).
Components
Code for the RaylFX Control Module
The control module uses the TM1637 display library. This library must be installed first. For this go in the Arduino menu to Sketch>Include Library>Manage Libraries … and search for TM1637 in the search field. Install the current version of the TM1637 library from Avishay Orpaz.
This program must be loaded onto the control-module. To do this, the Arduino Nano must first be selected in the menu of the Arduino software under Tools>Board. Then you have to select under Tools>Processor “ATmega328P (Old Bootloader)” and last under Tools>Port the port where the Arduino Nano is connected.
/*
     RaylFX Control Module
     StartHardware.org/en
*/

#include <TM1637Display.h>

/* ***** ***** Settings ***** ***** ***** *****  ***** ***** ***** *****  ***** ***** ***** ***** */

long theTimeout = 6;  // duration of one model city hour in seconds (minimum approx. 6)

/* ***** ***** From here begins the program code, which does not need to be adjusted ***** ***** ***** ***** */

int sendPin = 18;
long theTimer = 0;
int hours = 19;
int minutes = 50;

/* ***** ***** Segment Display ***** ***** */
#define numberOfSeconds(_time_) ((_time_ / 1000) % 60)
#define numberOfMinutes(_time_) (((_time_ / 1000) / 60) % 60)

/* Control Module */

#define NODE_MAX_NUMBER 127
#define PAYLOAD_SIZE 2

int nodePayload[NODE_MAX_NUMBER][PAYLOAD_SIZE];
TM1637Display display(2, 3);                      // segment display at D2 and D3

void setup() {
  Serial.begin(115200);
  pinMode(sendPin,OUTPUT);
  // Set brightness
  display.setBrightness(0x0c);
}
void loop() {
  if (theTimer + ((theTimeout)*1000/60) < millis()) {
    theTimer = millis();
    minutes++;
    if (minutes >= 60) {
      hours++;
      minutes = 0;
      if (hours >= 24) hours = 0;
        sendData();
    }


  }

  showTime(hours, minutes);  // output on segment display
  delay(10);
}

void sendData() {
  for (int i=0; i<24; i++){
    if (hours>=i) digitalWrite(sendPin, LOW);
    delay(1);
    digitalWrite(sendPin, HIGH);
    delay(1);
  }

}


/* Segment Display */
void showTime(int theHour, int theMinute) {
  display.showNumberDecEx(theMinute, 0, true, 2, 2);
  display.showNumberDecEx(theHour, 0b01000000, true, 2, 0);
}
In the code, in the settings section, you can now determine how many seconds (theTimeout) in the real world should correspond to one hour in the model world.
After setting it up, you can just transfer the code to the Arduino nano and that’s it.

Pingback: RaylFX Fair module
Pingback: RaylFX – Traffic Light Module - StartHardware - Tutorials for Arduino
Pingback: RaylFX operation site – with Arduino and flashing blue light - StartHardware - Tutorials for Arduino
Pingback: RaylFX – Village - StartHardware - Tutorials for Arduino
Pingback: RaylFX – Level Crossing with Arduino - StartHardware - Tutorials for Arduino
Pingback: RaylFX – Military Training Area for Model Railway and Model Making - StartHardware - Tutorials for Arduino
Pingback: RaylFX – Ambient Lighting for model city
Pingback: RaylFX – Forestry Module - StartHardware - Tutorials for Arduino
Pingback: RaylFX – Train Station - StartHardware - Tutorials for Arduino