In diesem Beitrag geht es um die Arduino Uhrzeit mit der Real Time Clock (RTC). Oft benötigt man für ein Projekt eine Uhrzeit. Vielleicht willst du einen Wecker bauen oder eine zeitgesteuerte Elektronik. Dann sucht man nach dem Befehl, mit dem man die Uhrzeit auslesen kann und findet heraus, dass das Arduino-Board keine Uhrzeit zur Verfügung stellt. Hier hilft eine Real Time Clock (RTC).
Bei einer Real Time Clock handelt es sich um ein Hardware-Modul mit Batterie und Speicher. Viele dieser Module basieren auf dem DS1307 Chip. Er wird per I2C-Interface angesprochen. Ich verwende in diesem Beispiel das Tiny RTC Modul, es funktionieren aber sehr viele RTCs mit dem gleichen Code.
Schaltplan: Arduino Uhrzeit mit RTC
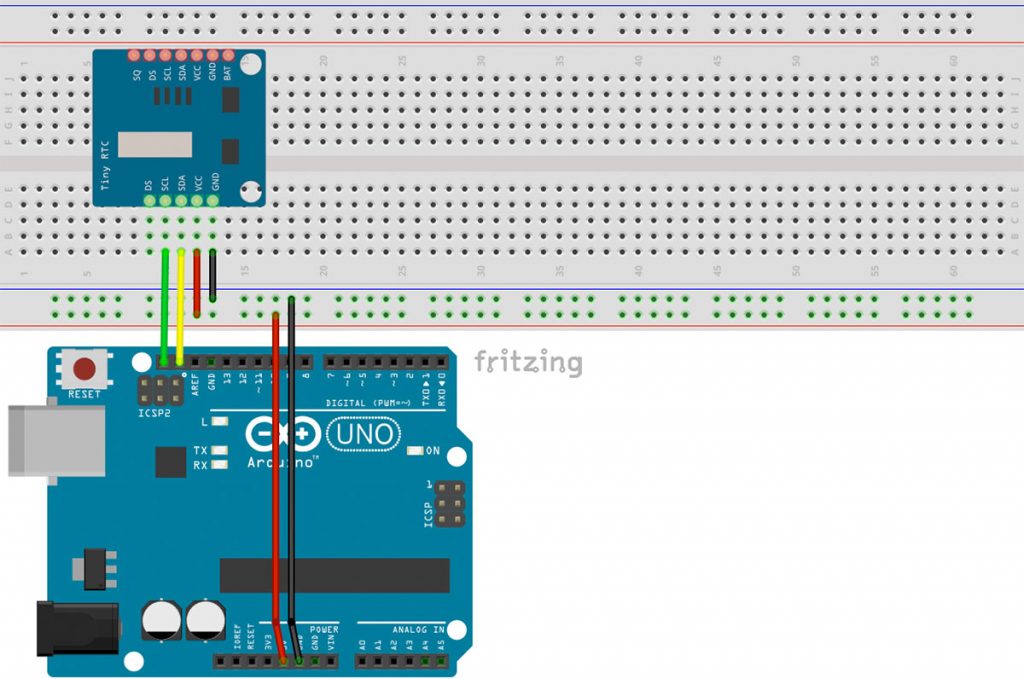
Das RTC-Modul wird mit 5V+ und GND verbunden. Dazu werden die I2C-Pins angeschlossen: SDA an SDA, SCL an SCL.
Programm-Code
Um das RTC-Modul zu betreiben, brauchst du noch eine Programmbibliothek. Um sie zu installieren, klicke in der Arduino-Software auf Sketch>Bibliothek einbinden>Bibliotheken verwalten … und suche im Suchfeld nach RTC by Makuna. Installiere die aktuelle Version. Den Beispiel-Code findest du jetzt unter Datei>Beispiele>RTC by Makuna>DS1307_Simple. Wenn du ein anderes Modul verwendest, musst du natürlich das dazugehörige Beispiel öffnen.
// CONNECTIONS:
// DS1307 SDA --> SDA
// DS1307 SCL --> SCL
// DS1307 VCC --> 5v
// DS1307 GND --> GND

/* for software wire use below
#include <SoftwareWire.h>  // must be included here so that Arduino library object file references work
#include <RTCDS1307.h>

SoftwareWire myWire(SDA, SCL);
RTCDS1307<SoftwareWire> Rtc(myWire);
 for software wire use above */

/* for normal hardware wire use below */
#include <Wire.h> // must be included here so that Arduino library object file references work
#include <RTCDS1307.h>
RTCDS1307<TwoWire> Rtc(Wire);
/* for normal hardware wire use above */

void setup ()
{
    Serial.begin(57600);

    Serial.print("compiled: ");
    Serial.print(__DATE__);
    Serial.println(__TIME__);

    //--------RTC SETUP ------------
    // if you are using ESP-01 then uncomment the line below to reset the pins to
    // the available pins for SDA, SCL
    // Wire.begin(0, 2); // due to limited pins, use pin 0 and 2 for SDA, SCL

    Rtc.Begin();

    RtcDateTime compiled = RtcDateTime(__DATE__, __TIME__);
    printDateTime(compiled);
    Serial.println();

    if (!Rtc.IsDateTimeValid())
    {
        if (Rtc.LastError() != 0)
        {
            // we have a communications error
            // see https://www.arduino.cc/en/Reference/WireEndTransmission for
            // what the number means
            Serial.print("RTC communications error = ");
            Serial.println(Rtc.LastError());
        }
        else
        {
            // Common Causes:
            //    1) first time you ran and the device wasn't running yet
            //    2) the battery on the device is low or even missing

            Serial.println("RTC lost confidence in the DateTime!");
            // following line sets the RTC to the date & time this sketch was compiled
            // it will also reset the valid flag internally unless the Rtc device is
            // having an issue

            Rtc.SetDateTime(compiled);
        }
    }

    if (!Rtc.GetIsRunning())
    {
        Serial.println("RTC was not actively running, starting now");
        Rtc.SetIsRunning(true);
    }

    RtcDateTime now = Rtc.GetDateTime();
    if (now < compiled)
    {
        Serial.println("RTC is older than compile time!  (Updating DateTime)");
        Rtc.SetDateTime(compiled);
    }
    else if (now > compiled)
    {
        Serial.println("RTC is newer than compile time. (this is expected)");
    }
    else if (now == compiled)
    {
        Serial.println("RTC is the same as compile time! (not expected but all is fine)");
    }

    // never assume the Rtc was last configured by you, so
    // just clear them to your needed state
    Rtc.SetSquareWavePin(DS1307SquareWaveOut_Low);
}

void loop ()
{
    if (!Rtc.IsDateTimeValid())
    {
        if (Rtc.LastError() != 0)
        {
            // we have a communications error
            // see https://www.arduino.cc/en/Reference/WireEndTransmission for
            // what the number means
            Serial.print("RTC communications error = ");
            Serial.println(Rtc.LastError());
        }
        else
        {
            // Common Causes:
            //    1) the battery on the device is low or even missing and the power line was disconnected
            Serial.println("RTC lost confidence in the DateTime!");
        }
    }

    RtcDateTime now = Rtc.GetDateTime();

    printDateTime(now);
    Serial.println();

    delay(10000); // ten seconds
}

#define countof(a) (sizeof(a) / sizeof(a[0]))

void printDateTime(const RtcDateTime& dt)
{
    char datestring[20];

    snprintf_P(datestring,
            countof(datestring),
            PSTR("%02u/%02u/%04u %02u:%02u:%02u"),
            dt.Month(),
            dt.Day(),
            dt.Year(),
            dt.Hour(),
            dt.Minute(),
            dt.Second() );
    Serial.print(datestring);
}
Wenn du jetzt den seriellen Monitor öffnest, kannst du die Ausgabe der Real-Time-Clock sehen. Achtung, die Baudrate des seriellen Monitors muss auf 57600 gesetzt werden.
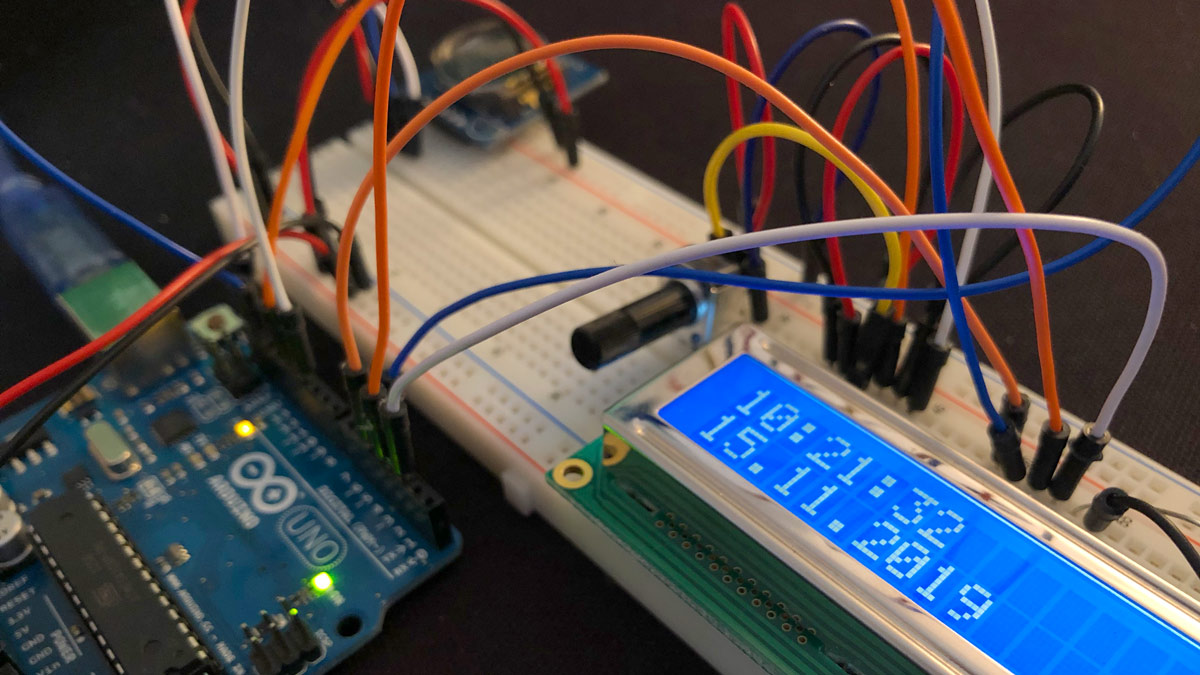
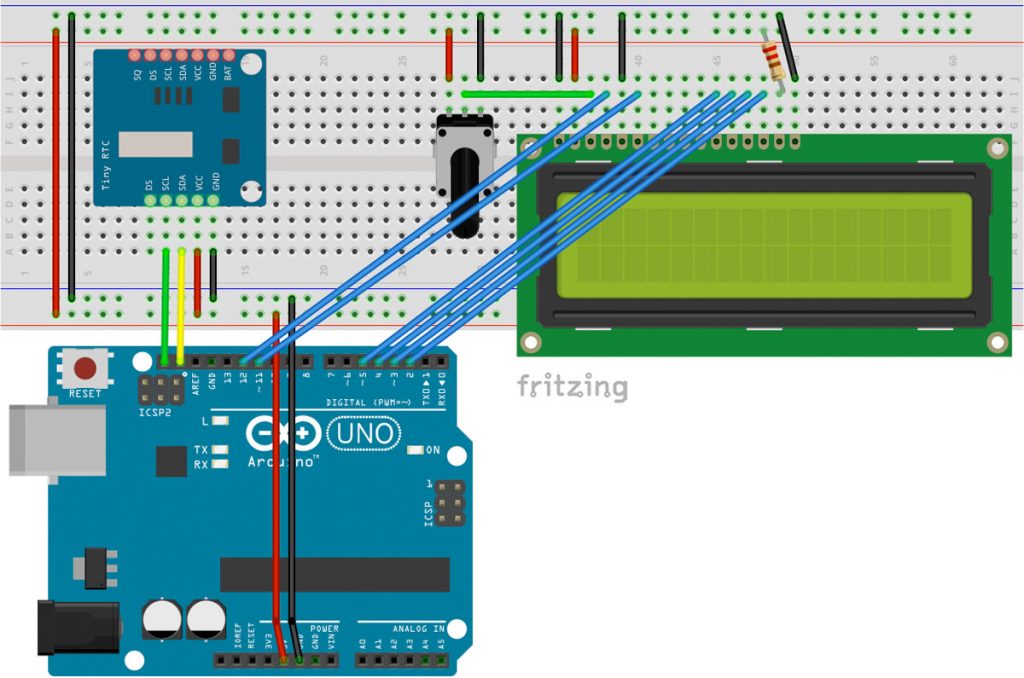
Arduino Uhrzeit mit der Real Time Clock (RTC) und LCD
Nun möchte ich dir aber noch zeigen, wie du die Uhrzeit auf einem LCD-Display anzeigen kannst. Baue dazu folgende Schaltung.
Code für Arduino RTC mit LCD
Der Code benötigt die LiquidCrystal-Bibliothek, die aber schon in der Arduino-Software installiert sein sollte. Darüber hinaus handelt es sich im Grunde wieder um den Beispiel-Code aus dem Beispiel weiter oben. Er ist lediglich mit der LCD-Funktionalität erweitert:
#include <LiquidCrystal.h>

// CONNECTIONS:
// DS1307 SDA --> SDA
// DS1307 SCL --> SCL
// DS1307 VCC --> 5v
// DS1307 GND --> GND

/* for software wire use below
  #include <SoftwareWire.h>  // must be included here so that Arduino library object file references work
  #include <RTCDS1307.h>

  SoftwareWire myWire(SDA, SCL);
  RTCDS1307<SoftwareWire> Rtc(myWire);
  for software wire use above */

/* for normal hardware wire use below */

#include <Wire.h> // must be included here so that Arduino library object file references work
#include <RTCDS1307.h>
RTCDS1307<TwoWire> Rtc(Wire);
/* for normal hardware wire use above */

const int rs = 12, en = 11, d4 = 5, d5 = 4, d6 = 3, d7 = 2;
LiquidCrystal lcd(rs, en, d4, d5, d6, d7);

void setup (){
  lcd.begin(16, 2);

  Serial.begin(57600);

  Serial.print("compiled: ");
  Serial.print(__DATE__);
  Serial.println(__TIME__);

  //--------RTC SETUP ------------
  // if you are using ESP-01 then uncomment the line below to reset the pins to
  // the available pins for SDA, SCL
  // Wire.begin(0, 2); // due to limited pins, use pin 0 and 2 for SDA, SCL

  Rtc.Begin();

  RtcDateTime compiled = RtcDateTime(__DATE__, __TIME__);
  printDateTime(compiled);

  if (!Rtc.IsDateTimeValid())
  {
    if (Rtc.LastError() != 0)
    {
      // we have a communications error
      // see https://www.arduino.cc/en/Reference/WireEndTransmission for
      // what the number means
      Serial.print("RTC communications error = ");
      Serial.println(Rtc.LastError());
    }
    else
    {
      // Common Causes:
      //    1) first time you ran and the device wasn't running yet
      //    2) the battery on the device is low or even missing

      Serial.println("RTC lost confidence in the DateTime!");
      // following line sets the RTC to the date & time this sketch was compiled
      // it will also reset the valid flag internally unless the Rtc device is
      // having an issue

      Rtc.SetDateTime(compiled);
    }
  }

  if (!Rtc.GetIsRunning())
  {
    Serial.println("RTC was not actively running, starting now");
    Rtc.SetIsRunning(true);
  }

  RtcDateTime now = Rtc.GetDateTime();
  if (now < compiled)
  {
    Serial.println("RTC is older than compile time!  (Updating DateTime)");
    Rtc.SetDateTime(compiled);
  }
  else if (now > compiled)
  {
    Serial.println("RTC is newer than compile time. (this is expected)");
  }
  else if (now == compiled)
  {
    Serial.println("RTC is the same as compile time! (not expected but all is fine)");
  }


  // never assume the Rtc was last configured by you, so
  // just clear them to your needed state
  Rtc.SetSquareWavePin(DS1307SquareWaveOut_Low);
}

void loop ()
{
  Serial.print(".");
  if (!Rtc.IsDateTimeValid())
  {
    if (Rtc.LastError() != 0)
    {
      // we have a communications error
      // see https://www.arduino.cc/en/Reference/WireEndTransmission for
      // what the number means
      Serial.print("RTC communications error = ");
      Serial.println(Rtc.LastError());
    }
    else
    {
      // Common Causes:
      //    1) the battery on the device is low or even missing and the power line was disconnected
      Serial.println("RTC lost confidence in the DateTime!");
    }
  }

  RtcDateTime now = Rtc.GetDateTime();

  printDateTime(now);
  lcdShowTime(now);


  delay(1000); // ten seconds
}

#define countof(a) (sizeof(a) / sizeof(a[0]))

void lcdShowTime(const RtcDateTime& dt)
{
  char datestring[20];
  char timestring[20];

  snprintf_P(datestring,
             countof(datestring),
             PSTR("%02u.%02u.%04u"),
             dt.Day(),
             dt.Month(),
             dt.Year() );

  snprintf_P(timestring,
             countof(timestring),
             PSTR("%02u:%02u:%02u"),
             dt.Hour(),
             dt.Minute(),
             dt.Second() );

  lcd.setCursor(0, 0);
  lcd.print(timestring);

  lcd.setCursor(0, 1);
  lcd.print(datestring);
}

void printDateTime(const RtcDateTime& dt)
{
  char datestring[20];

  snprintf_P(datestring,
             countof(datestring),
             PSTR("%02u/%02u/%04u %02u:%02u:%02u"),
             dt.Month(),
             dt.Day(),
             dt.Year(),
             dt.Hour(),
             dt.Minute(),
             dt.Second() );
  Serial.print(datestring);
}

Wenn dir das Projekt gefallen hat und du von weiteren interessanten Projekten inspiriert werden willst, sieh dir doch mal mein neues E-Book »Arduino Projekte Volume 1« an!
- Die beliebtesten Arduino-Projekte von StartHardware
- Inklusive Schaltplan, Beschreibung und Code
- Arduino-Schnellstart-Kapitel
- Kompakter Programmierkurs
Ich habe das gleiche Problem wie Klaus, auch bei mir wirft er bei der Stelle einen Fehler aus.
Compilation error: ‘RTCDS1307’ is not a template
MfG
Pingback: Arduino Rheinturm – so baust du die größte Uhr der Welt nach
Pingback: Arduino millis() – Arduino Tutorial
Pingback: Leuchtender Adventskalender mit Arduino und WS2812 LED Strip
Hallo,
ich möchte das Datum und die Uhrzeit auf dem seriellen Monitor ausgeben.
Ich möchte die Temperatur eines DHT22 und das Datum auf SD abspeichern.
Die Temperatur speichert es mir schon ab, fehlt nur noch das Datum dazu.
Daher wollte ich erst mal nur mit dem seriellen Monitor üben.
Leider bleibt das Hochladen immer an dieser Stelle hängen.
RtcDS1307 Rtc(Wire);
Könnt Ihr mir da bitte weiterhelfen?
Vielen Dank